Tutorial: Build a Hovercraft – at Home!
On August 12, the Montréal Science Centre will be hosting an Air Hockey Championship to keep up with all the fun surrounding the Hockey: Faster Than Ever exhibition. The event will feature cool surprises, like a giant air hockey puck which uses the same principles that let a hovercraft move on water. Want to learn how to make your own hovercraft? Read on!
What’s a Hovercraft?
A hovercraft can glide across just about any surface… water, concrete, and even dirt roads. This is thanks to a special cushion of air that lets them, you guessed it, “hover.” A hovercraft has a motor that pushes air through a series of small holes under its skirt where it forms an air pillow. This air pillow lifts the vehicle off the surface using something called a sustentation system (or more plainly “lift”). This pillow lets the hovercraft get around without any surface friction slowing it down! A hovercraft is mostly used during rescue operations, especially the kind of emergencies involving floods.
What You’ll Need to Build Your Hovercraft
Gather the following items to start building your very own homemade hovercraft:
|
|
|
|
|
|
|
|
|
|
|
|
|
|
|
|
|
|
|
|
|
|
|
|
|
|
|
|
|
|
Got everything? OK, let’s get to work!
Step-by-Step Instructions
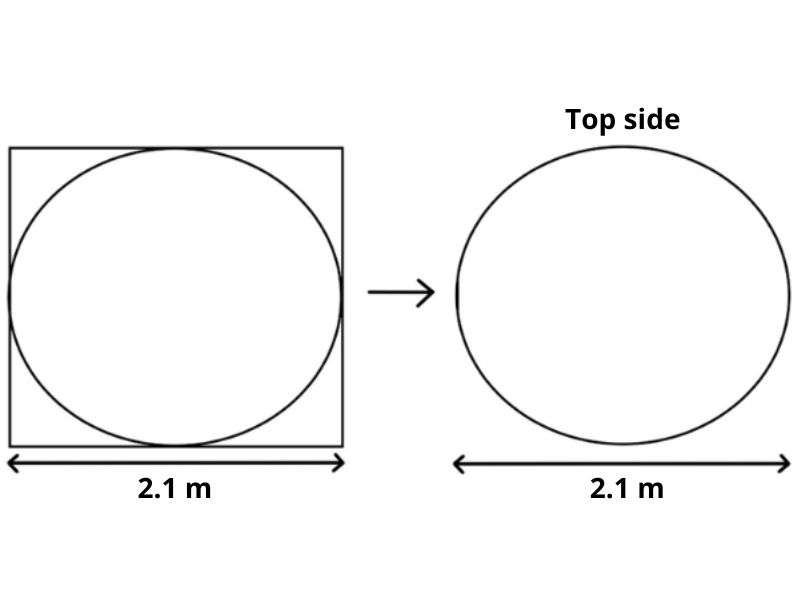
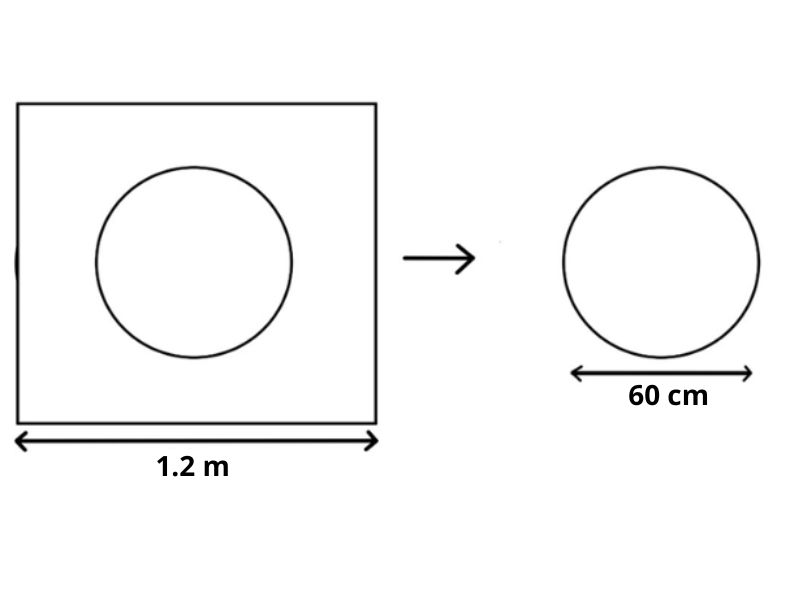
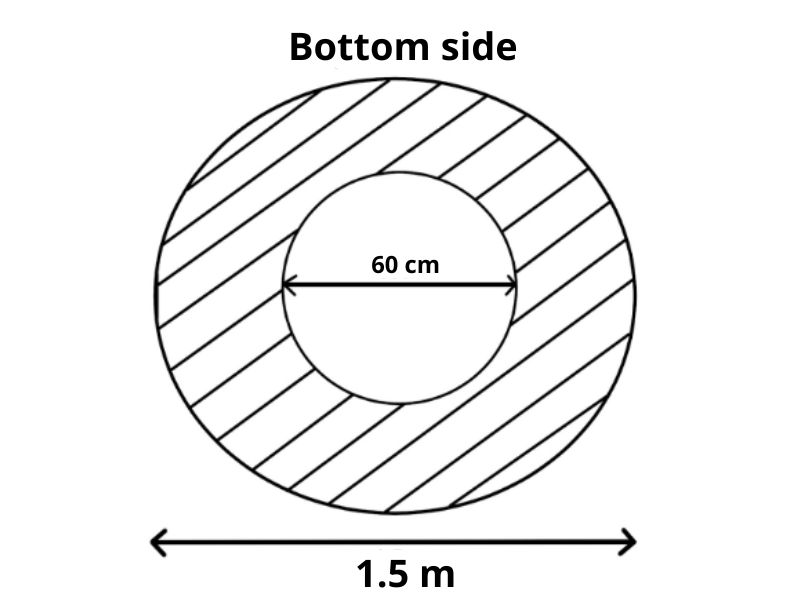
1. On the first plywood board, use the felt marker to draw a large circle with a diameter of 1.2 metres. See the video below for tips on how to draw a perfect circle of the right size. Use the jigsaw and cut out your circle.
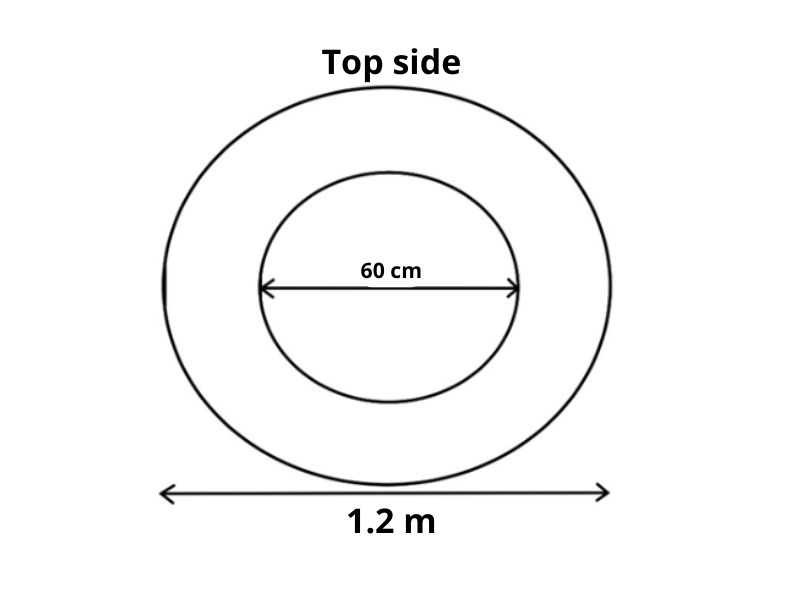
2. Using the marker again, draw a second, smaller circle with a 60 cm diameter in the centre of the circle you just cut out.
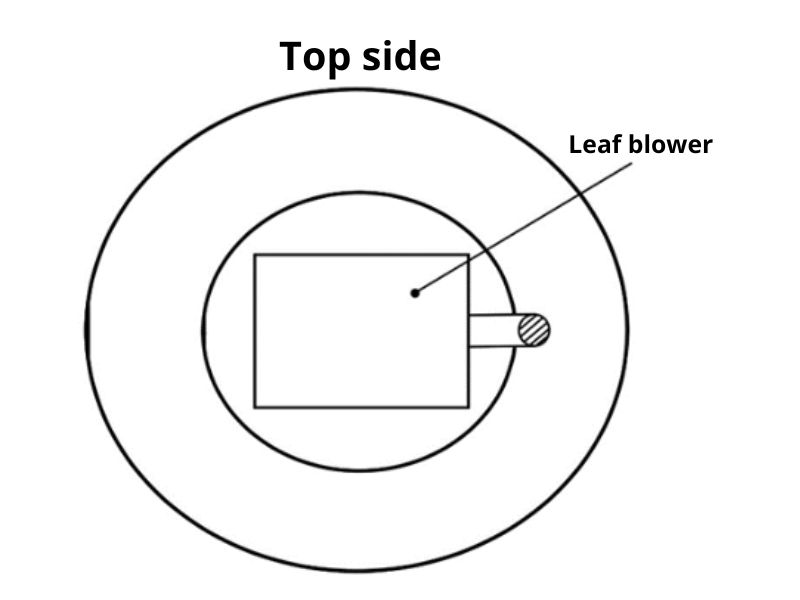
3. Attach the leaf blower pipe and aim it downwards at a 90° angle.
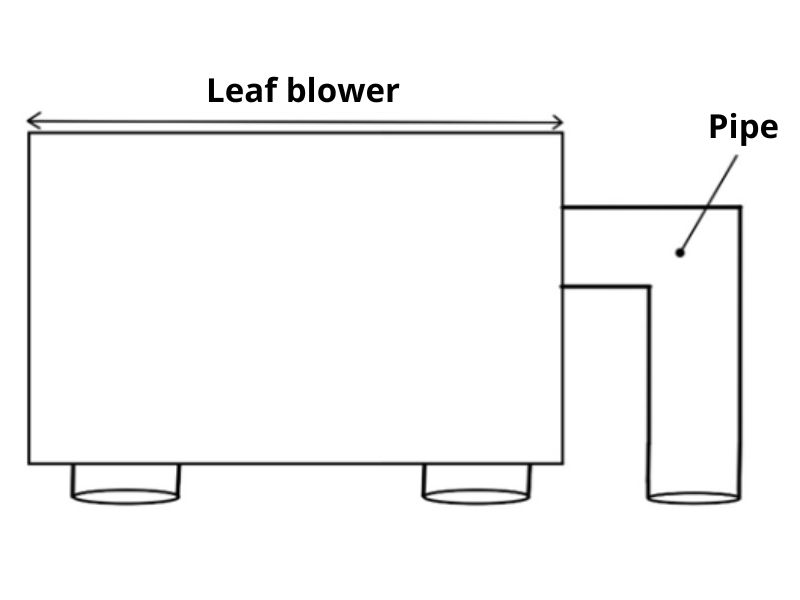
4. Place the leaf blower in the centre of the smaller circle. The tail end of the pipe should fall just outside this small circle.
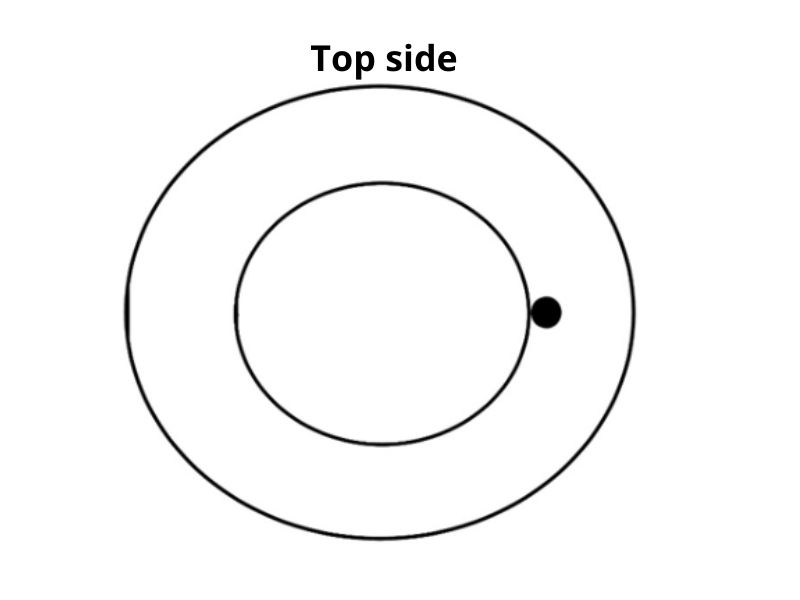
5. Trace around the tail end of the pipe with the marker and use the jigsaw to cut out a hole.
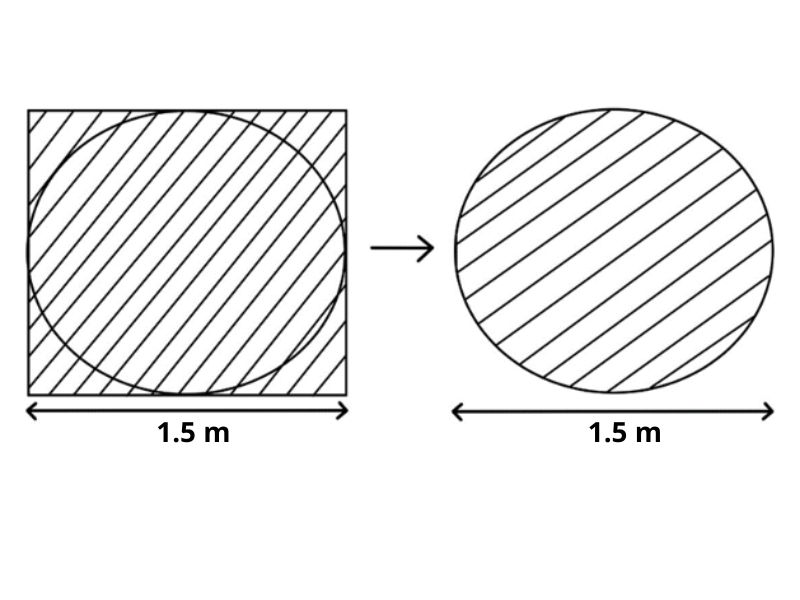
6. Lay out the plastic sheet and use the marker to draw a circle on it equal to the large plywood cutout (1.5 m in diameter). Use the scissors and cut out this circle from the plastic sheet.
7. Use the marker to draw another small circle (60 cm in diameter) on the second sheet of plywood. Use the jigsaw to cut out the circle.
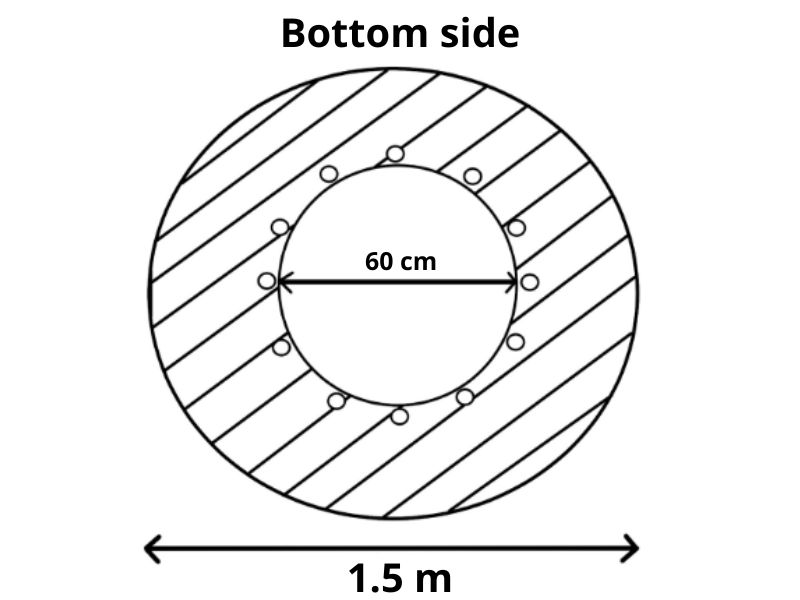
8. Place the small plywood circle in the middle of the large plastic cutout circle.
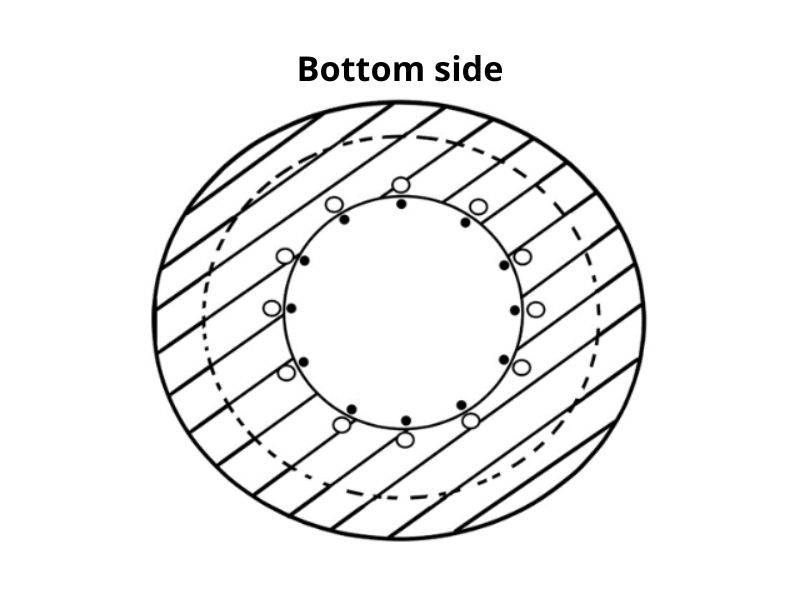
9. Using the $2 coin as a guide, make 12 evenly spaced circles in the plastic sheet right around the edge of the plywood circle. Use the scissors to cut these circles out.
10. Remove the small plywood circle from the plastic sheet and place the large plywood circle on it.
11. Fold the plastic sheet over the edge of the large plywood circle and staple it down. Careful not to wrap it too tightly (see the video below for tips on how to do this correctly). Use the glue or silicone to strengthen the bond between the plastic sheet and the plywood circle and make it airtight. Let this dry for one day. You can also use duct tape, which may work better if you painted the plywood surface.
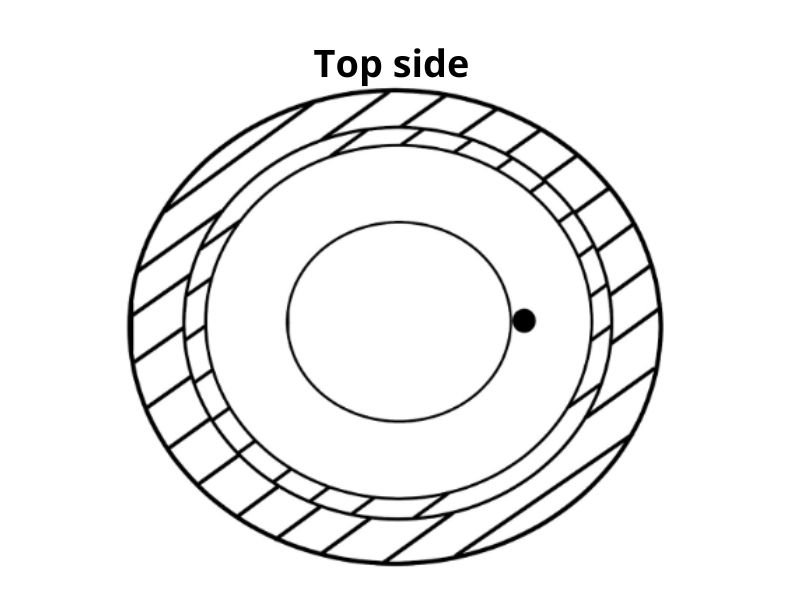
12. Flip the plywood circle over (plastic side up) and screw the smaller plywood circle onto it, on top of the plastic sheet.
13. Flip the plywood circle again (now plastic side down), and place the leaf blower on the topside of the large plywood circle and insert the pipe into the small hole you cut out for it earlier.

14. Using generous amounts of glue and silicone, secure the leaf blower and leaf blower pipe in place.
15. Wrap the edge of the large plywood circle with the pipe insulation to create a bumper (optional).
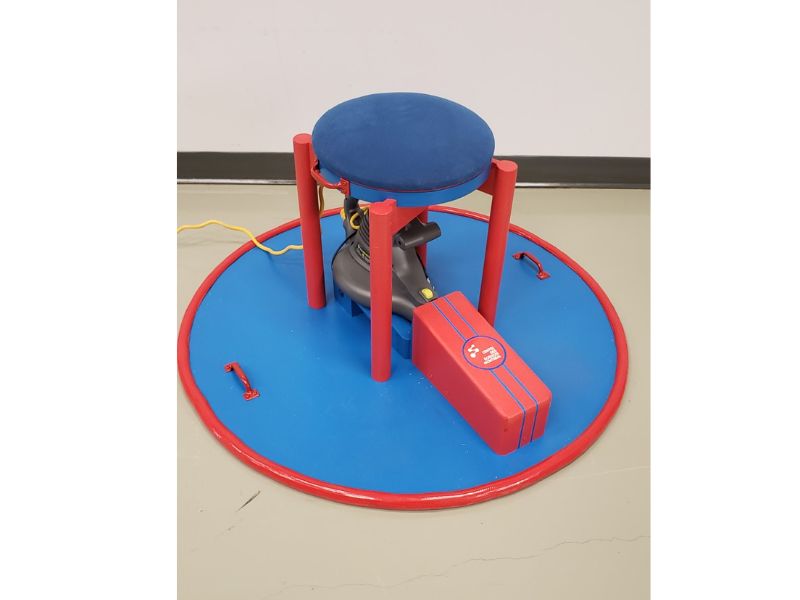
16. Install the small stool on top of the leaf blower (optional) and secure it in place.
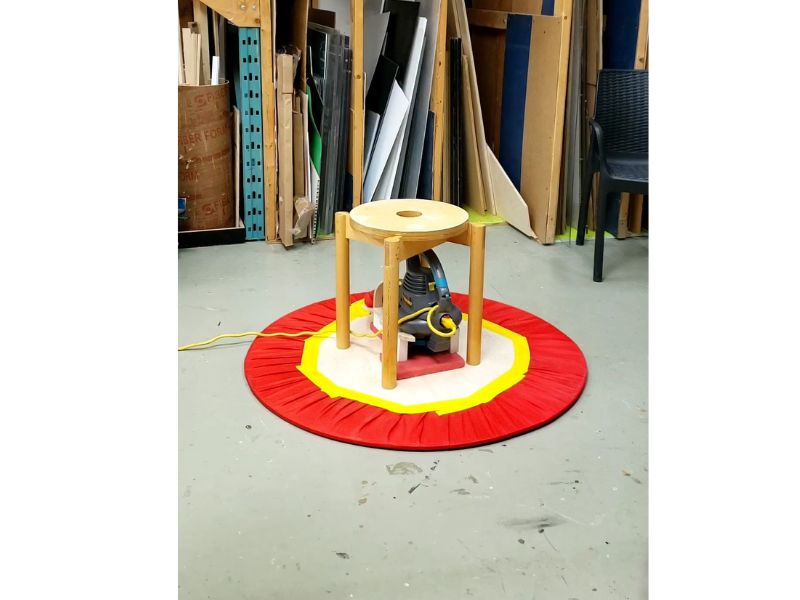
17. Turn on the leaf blower and test out your hovercraft!
Want to see these instructions in action? Check out this video:
Come try our very own hovercraft (in the shape of an air hockey puck) as part of the fun during our Air Hockey Championship event! Event tickets still available… but not for long!